
How to Use Style & Select for Your Photo Session (And Actually Enjoy the Outfit Planning)
If outfit planning makes you want to dramatically lie down on the floor for a minute, I see you. The good news is, you do not have to solve this with 47 open browser tabs and a growing sense of “why is this so hard.” You have a tool, a plan, and me in your corner.
Style & Select is the styling tool I provide to my clients to make planning outfits simple, visual, and kind of fun. It gives you curated, photo-friendly clothing options based on your answers, then lets you build outfits like you’re laying them out on a digital bed, minus the laundry pile.
This post is a true tutorial. If you follow the steps in order, you’ll end with outfit options you feel great about and a ready-to-shop email with links.
Step 1: Open My Styling Link and Enter Your Access Code
Start with my client link:
https://styleandselect.com/p/Lifestylephotographer
When the page prompts you, enter the access code I sent in your booking email. That code unlocks the Style Questionnaire and ties your session to my client portal. Style & Select calls these “styling access codes,” and they’re basically the key that gets you in the door.
If you ever see an “invalid code” message, it is usually one of two things: a typo (totally normal) or the wrong code copied over. Re-paste slowly, make sure there are no extra spaces, and try again.
Step 2: Fill Out the Style Questionnaire
Once you’re in, you’ll fill out the Style Questionnaire. This is where Style & Select does the heavy lifting for you, because your answers guide the results you’ll see.
The questionnaire is designed to collect the info that actually matters for styling: how many people are being photographed, sizes, and the general look you’re going for, including your preferred color scheme and vibe. Keep it simple and answer honestly, because the goal is not “perfect,” it’s “this feels like us.”
Tip from me: if you’re torn between two vibes, pick the one that feels most like your everyday self, not your imaginary life self. Your photos should feel like you.
Step 3: View Your Results (This Part Is the Fun Part)
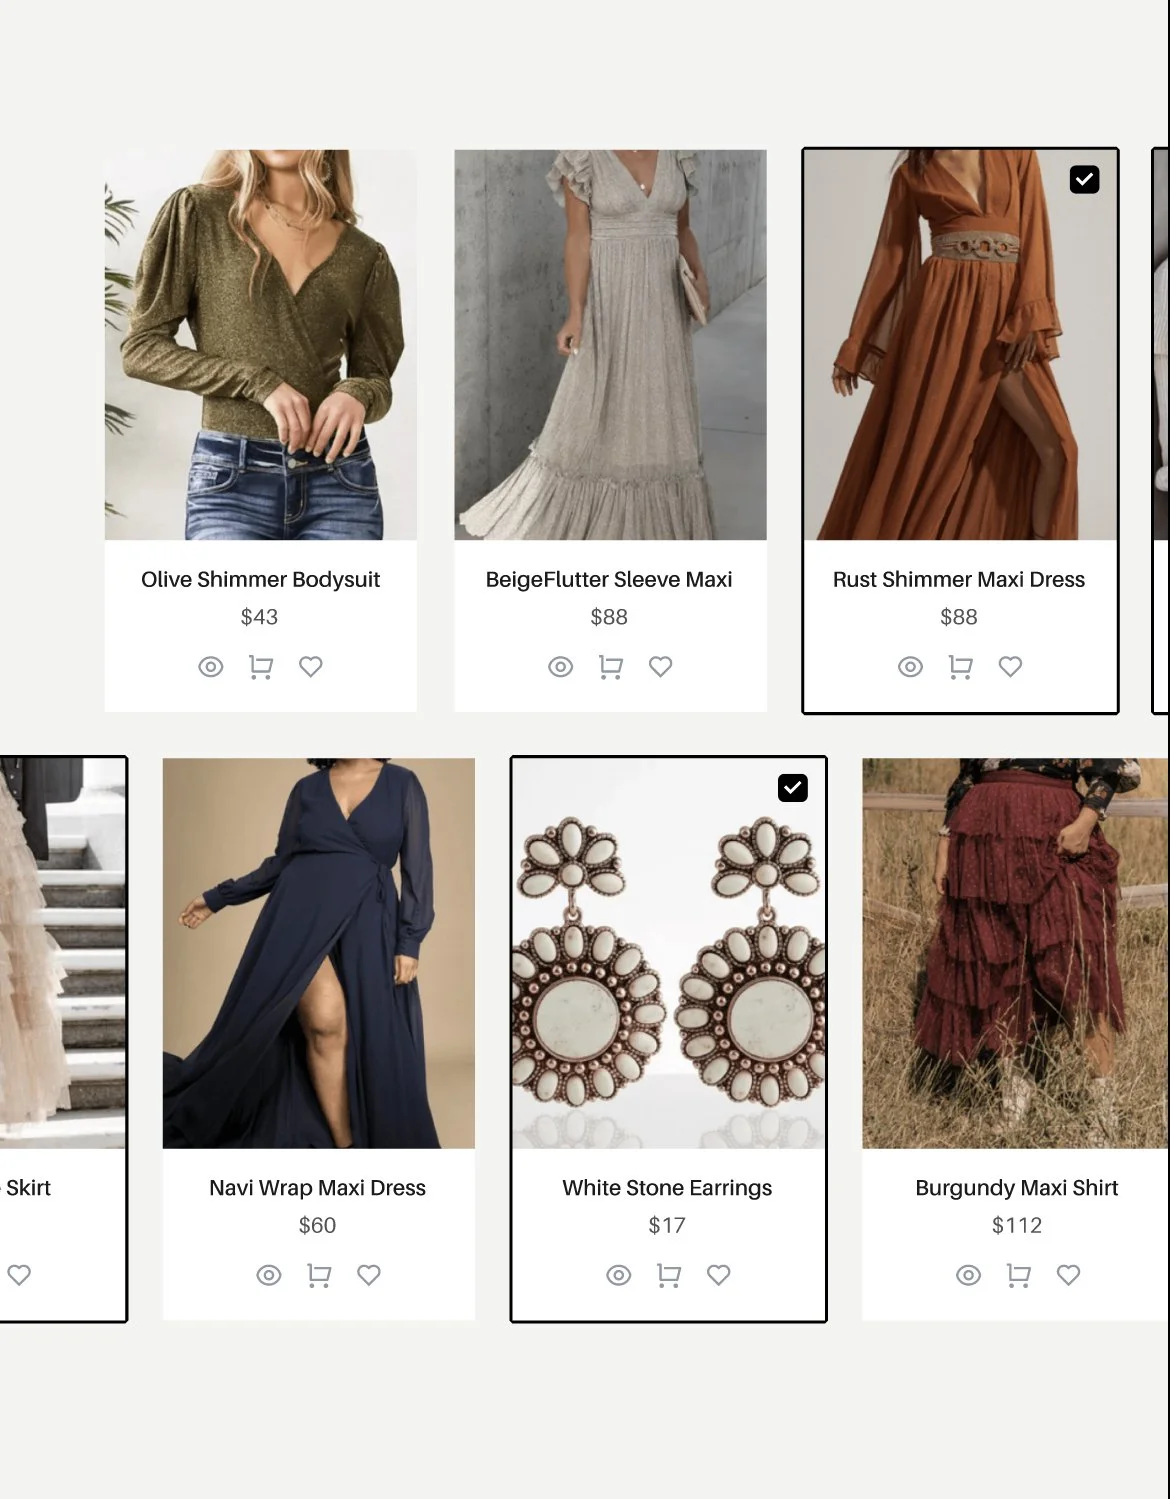
After you submit the questionnaire, your results show up immediately. You’ll see curated clothing options that match your selections, with direct links to retailers. This is the “ohhh okay, I can do this” moment for a lot of clients, because you’re no longer guessing what might work.
You can scroll and browse like you’re shopping, but with way fewer wrong turns, because the pieces are already filtered toward photo-friendly options.
Step 4: Tap the Heart on Anything You Love
As you browse, you’ll see a heart icon on items. Any time you spot something that feels right, click the heart.
When you heart an item, Style & Select pulls it into the coordination bar at the top, so you can start seeing your choices side by side. This is where the tool really shines, because it turns “I think these go together?” into “Yes, these go together.”
This is also where I want you to loosen your grip a little. Heart more than you think you need. Give yourself options. You can always narrow down later.
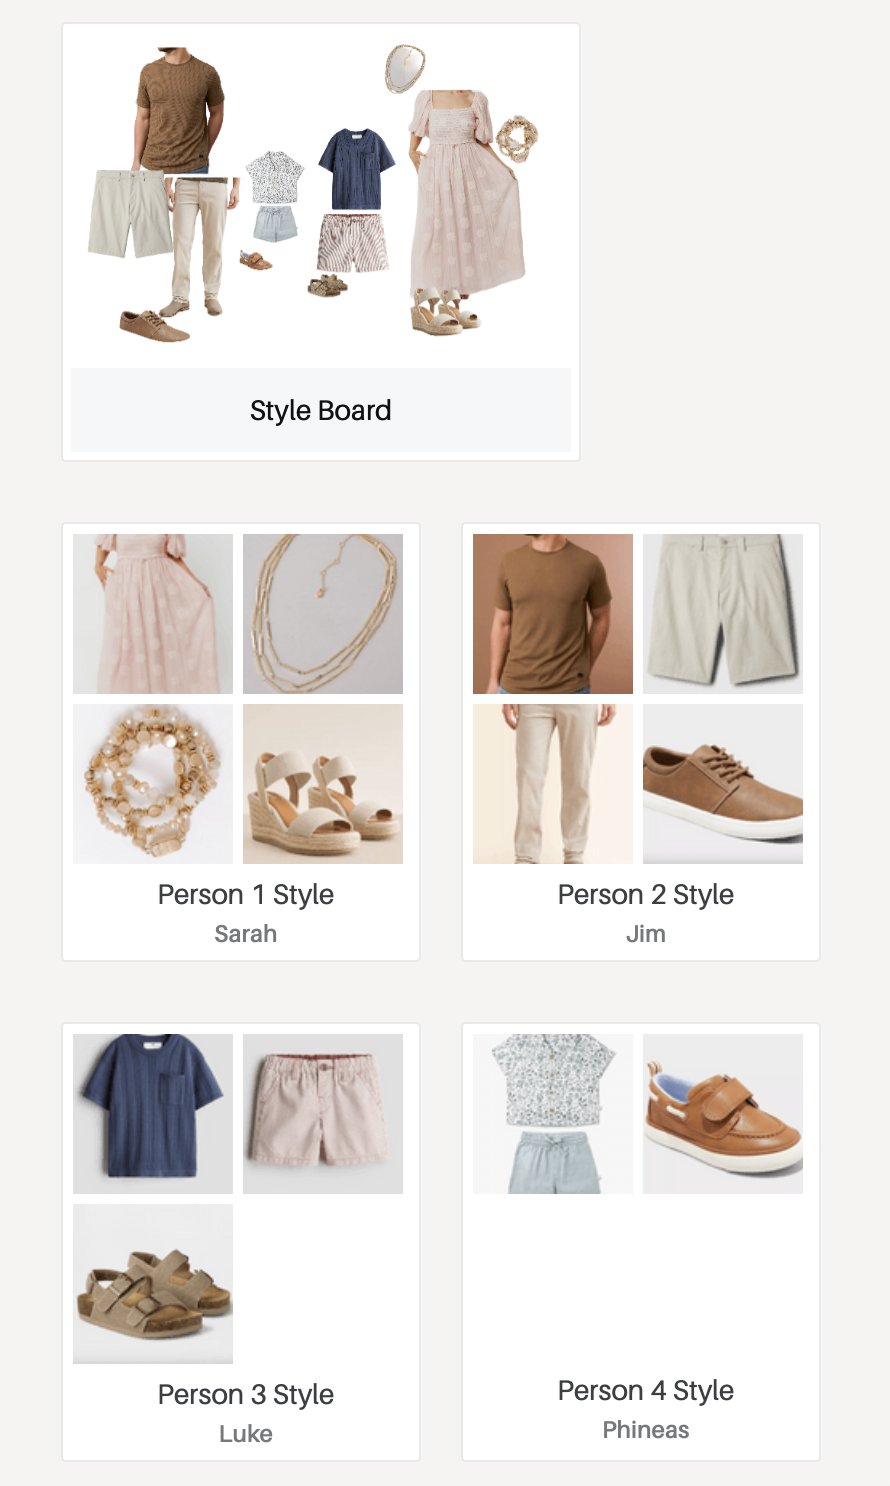
Step 5: Build Outfits in the Coordination Bar
Now you’re going to use that top coordination bar like your digital outfit-planning table.
Start building one person at a time. Choose an anchor outfit first, then add pieces for everyone else that complement it. The goal is not matching, it’s coordinating. Think “we belong in the same story,” not “we wore the same uniform.”
As you swap items in and out, you’ll see the whole look shift in real time. If something suddenly feels too bold, too busy, or too different from the rest, you’ll know immediately, and you can adjust without a full restart. Style & Select is built for exactly this.
Step 6: Email Your Final Selections to Yourself (And Anyone Else Helping)
Once you’ve coordinated outfits for everyone, you’ll use the email button inside Style & Select.
This sends an email that includes photos of the items, shopping links, and a spot for a custom message. It’s the easiest way to keep everything organized, and it’s also how Style & Select saves your outfit combinations, since saved outfits are stored via emailed selections.
I always recommend emailing it to yourself and one other decision-maker if needed, so you don’t end up with 9 different opinions floating around your group chat. Keep it cozy.
Step 7: Shop Directly From the Email, or Use It as Your Real-Life Guide
Here’s the best part: you do not have to buy everything that Style & Select suggests.
You can shop directly from the email links, or you can use the results as a guide and shop locally, or you can pull similar basics from your own closet and just buy one or two missing pieces. Style & Select even encourages using what you already own, and using the results as a visual guide.
If you already have pieces you love, amazing. We’re not reinventing your wardrobe. We’re just coordinating it.
Step 8: If You Want Me to Check It, Send Me Your Board Email
If you’d like my eyes on it, email me your Style & Select selections (or screenshots of your coordination bar) and I’ll help you fine-tune.
Sometimes it’s a tiny tweak, like swapping one pattern for texture. Sometimes it’s just reassurance that you nailed it. Either way, you don’t have to wonder in silence.
Quick Troubleshooting (Because Life)
“My code doesn’t work”
Re-copy it from your booking email, make sure there are no extra spaces, and try again. If it still won’t unlock the questionnaire, tell me and we’ll fix it fast. Style & Select notes invalid codes are often user error, and testing by re-entering the code can help pinpoint it.
“I don’t want to buy new outfits”
Totally fine. Use the results as inspiration, pull from your closet, shop locally, or buy only one key piece. This tool is meant to be flexible.
“Can we include items from your client closet?”
Style & Select supports adding a photographer’s client closet items into a library, so those pieces can show up in results and be coordinated alongside the curated options. If your session includes client closet access, I’ll guide you on how we’re blending those pieces in
FAQ
Do I have to finish this in one sitting?
Nope. Start, heart a few favorites, step away, come back. The tool is built for real life.
When should I do this?
Aim for about 2 to 3 weeks before your session so you have time for shipping or simple swaps.
Can I use this on my phone?
Yes, it’s designed to be easy to use as you browse and plan. (This is a “school pickup line friendly” tool, truly.)
How do my outfits get saved?
Through the email feature. Your emailed selections include images and links, and Style & Select logs them in the account as “Emailed Selections.”